The foodie-favorite destination celebrates a major milestone with a new cookbook chock-full of temptations
Introduction by MARIE LOOK
Recipes by BOBBIE LLOYD
Photography by NED SEMOFF
Devotees of New York-founded Magnolia Bakery and its world-famous cupcakes and other goods will be thrilled to get their hands on a new cookbook celebrating the dessert destination’s 25th anniversary.
Since the original location opened in the West Village in 1996, Magnolia has expanded to a handful of other American cities, including Los Angeles (8389 W. Third Street) in 2010, plus India, the Philippines and other countries. It’s safe to say that the bakery has risen to the level of cultural institution, with namechecks in the show Sex and the City and the film The Devil Wears Prada to its credit.
Now, with the arrival of The Magnolia Bakery Handbook (Harper Collins, $35), home chefs can whip up some of the shop’s most beloved recipes, thoughtfully updated by chief baking officer Bobbie Lloyd to further tantalize and delight the taste buds. From cinnamon-spiked cupcakes with cream cheese frosting to so-cute-you-could-squeal individual servings of banana pudding, the new title presents nearly 150 of the treats that have been feeding Magnolia’s success these past two and a half decades.
Here, C shares a few of Lloyd’s favorites, as seen in the new release, that are totally worth the effort and sure to bring homebaked comfort to your kitchen in the autumn days ahead.
• • • • •
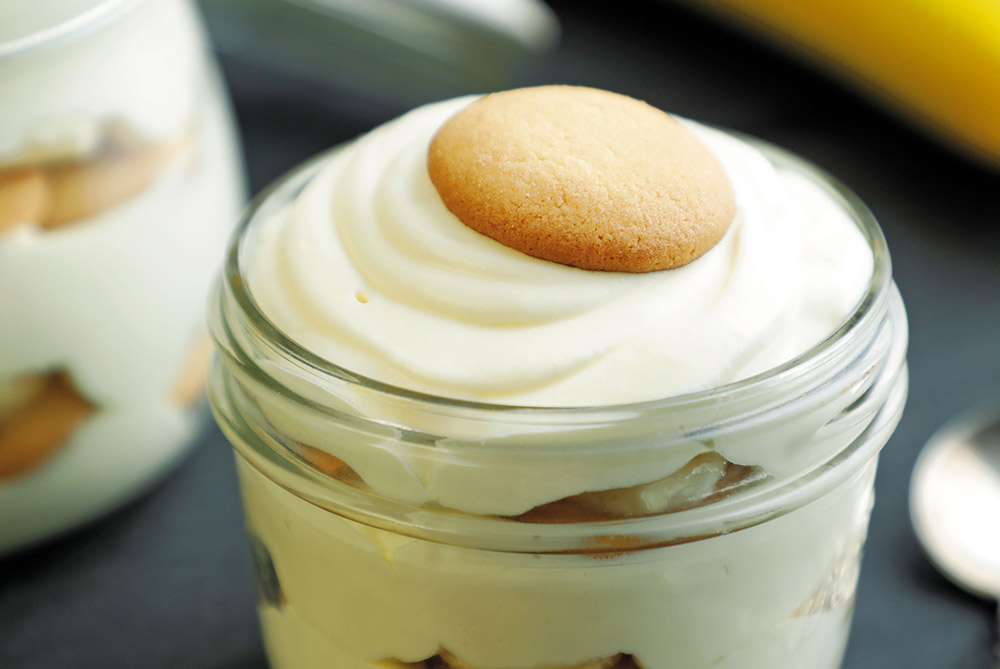
MAGNOLIA BAKERY’S FAMOUS BANANA PUDDING
makes 4 to 5 quarts; serves up to 16
Banana pudding has been around since the late 1800s, when faster steam ships meant bananas could make their way to U.S. ports. It was first made with sponge cake, but by the 1920s, cake was replaced with vanilla wafers. For this recipe, I use Nabisco Nilla wafers and strongly recommend you don’t make any substitutions to ensure you get the crave-worthy texture of this iconic dessert.
- 1 (14 oz.) can sweetened condensed milk
- 1½-cups (360 g/12.7 oz) ice-cold water
- 1 (3.4 oz) package instant vanilla pudding mix (preferably Jell-O brand)
- 3 cups (720 g/25.5 oz) heavy cream
- 1 (11 oz) box Nilla wafers
- 4 to 5 ripe bananas, sliced
In a stand mixer with the whisk, beat the condensed milk and water on medium speed until well combined, about 1 minute. Add the pudding mix and beat until there are no lumps and the mixture is smooth, about 2 minutes. Transfer the mixture to a medium bowl, cover, and refrigerate until firm, at least 1 hour or overnight.
In a stand mixer with the whisk, whip the heavy cream on medium speed for about 1 minute, until the cream starts to thicken, then increase the speed to medium-high and whip until stiff peaks form. Be careful not to over whip.
With the mixer running on low speed, add the pudding mixture a spoonful at a time. Mix until well blended and no streaks of pudding remain.
To assemble, select a trifle bowl or a wide glass bowl with a 4- to 5-quart capacity, or individual serving bowls.
Saving 4 to 5 cookies for the garnish on top, begin assembly. Spread one-quarter of the pudding over the bottom and layer with one-third of the cookies and one-third of the sliced bananas (enough to cover the layer). Repeat the layering twice more. End with a final layer of pudding. Garnish the top with additional cookies or cookie crumbs.
Cover tightly with plastic wrap and refrigerate for 4 to 6 hours. Cookies should be tender when poked with a knife. This dessert is best served within 12 hours of assembling.
• • • • •

CARROT CUPCAKES
makes 24 cupcakes
Jampacked with fruit, nuts and carrots, these flavorful cupcakes are great on their own or with a tangy smear of cream cheese icing. And they’re a delicious way to sneak a lot of fiber into your diet!
- 2 cups (270 g/9.6 oz) all-purpose flour
- 1 teaspoon baking powder
- 1 teaspoon baking soda
- 1 teaspoon ground cinnamon
- ⅛ teaspoon grated nutmeg
- ½ teaspoon salt
- 2 cups (212 g/7.5 oz) lightly packed shredded carrots (about 3 large)
- 1 (8-ounce) can juice-packed crushed pineapple, drained
- ¾ cup (112 g/3.9 oz) raisins tossed with 1 tablespoon flour
- ¾ cup (90 g/3.2 oz) coarsely chopped toasted walnuts (see Tip, page 288), plus more for garnish
- ¾ cup (75 g/2.6 oz) sweetened shredded coconut
- 3 eggs
- 1¾-cups (350 g/12.4 oz) granulated sugar
- 1½-teaspoons pure vanilla extract
- 1 cup (208 g/7.2 oz) vegetable oil
- Cream Cheese Icing (see recipe below)
Preheat the oven to 325°F. Line two 12-cup muffin tins with paper liners.
In a medium bowl, whisk together the flour, baking powder, baking soda, cinnamon, nutmeg, and salt. Set aside.
In another medium bowl, toss together the shredded carrots, pineapple, raisins, toasted walnuts, and coconut. Set aside.
In a stand mixer with the paddle, beat together the eggs and sugar on medium speed until light and thick, about 2 minutes. Add the vanilla and oil and beat well. Scrape down the sides and bottom of the bowl.
On low speed, gradually add the flour mixture, mixing until just barely incorporated. Remove the bowl from the mixer and scrape down the sides and bottom. Use a rubber spatula to fold and mix the batter until no streaks of flour remain.
Transfer to a large, wide bowl and fold in the carrot mixture.
Using a #20 scoop or a ¼-cup dry measuring cup, evenly scoop the batter into the prepared muffin cups. Bake for 22 to 24 minutes, or until a cake tester inserted in the centers comes out clean.
Let the cupcakes cool in the pans for 30 minutes. Transfer to cooling racks to cool completely.
To decorate as in the photo, fit a piping bag with a Wilton #1M tip, fill with the icing, and pipe a large rosette on the cupcakes. Sprinkle with toasted walnuts.
• • • • •
CREAM CHEESE ICING
makes about 4 cups (enough for one 9-inch two-layer cake or 24 cupcakes)
I am not a fan of super-sweet cream cheese icing, mostly because I feel the sweetness can overpower the tangy flavor.
- 4 (8 oz) packages full-fat cream cheese (preferably Philadelphia brand), broken into large chunks, at room temperature (but not too soft)
- 1 tablespoon pure vanilla extract
- 1½-cups (118 g/6.6 oz) powdered sugar, sifted
In a stand mixer with the paddle, beat the cream cheese on low speed until smooth, about 2 minutes. Scrape down the sides and bottom of the bowl. Add the vanilla and beat just until incorporated. With the mixer running on low, gradually add the sugar, ½ cup (62g/2oz) at a time, beating until smooth but not creamy. Scrape the bottom and sides of the bowl. Be careful not to overbeat or the icing will become gummy.
Use immediately. If the icing looks a little gummy (you overmixed), you can cover and refrigerate it for 2 to 3 hours to thicken. It’s best to use this the same day. If you want to make it ahead of time, refrigerate covered for up to 3 days. Bring to room temperature before use. You may need to beat it again to soften.
• • • • •
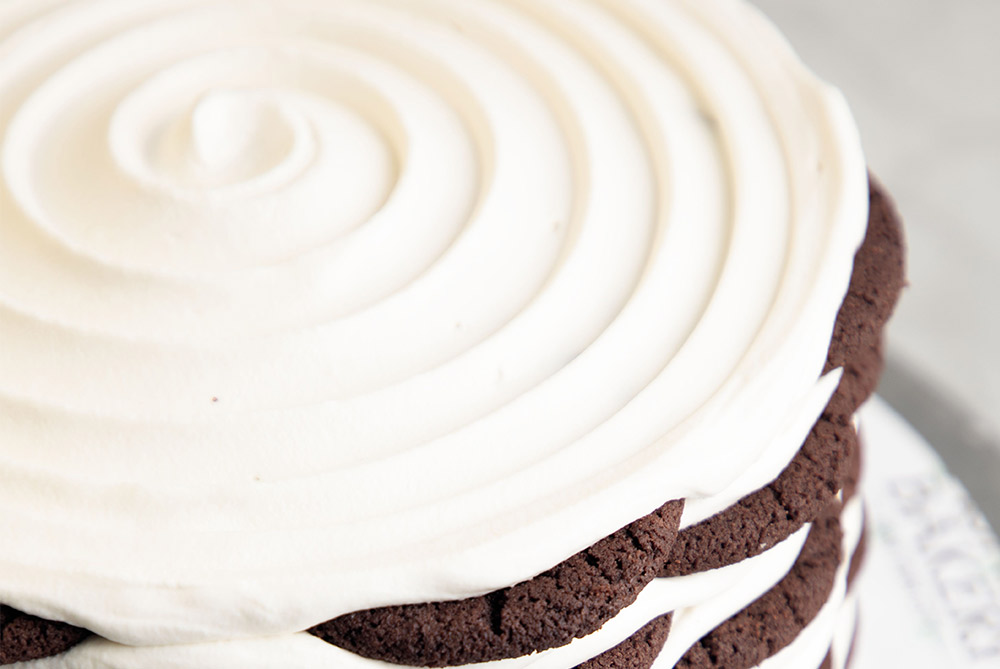
ICEBOX CAKE
serves 6 to 12
A classic icebox cake has only two ingredients: rich chocolate wafers and whipped cream. To make the cake, carefully layer the cookies and cream (I tell you how!) and place in the fridge for a few hours to soften up the cookies and meld the flavors. The result is a remarkably delicious, delicately textured dessert. While you can use the Nabisco Famous Chocolate Wafers, this cake is much better if you make the wafers yourself. Your efforts will really pay off.
- 4 cups (903 g/32 oz) heavy cream
- 3 tablespoons (37.5 g/1.3 oz) granulated sugar
- 1 tablespoon pure vanilla extract
- 70 Chocolate Wafer Cookies (see recipe below)
- Use 7 wafers on each cake layer: Place 1 at center and 6 around the perimeter. Position each wafer on the perimeter directly between 2 wafers in the row below.
Place a 10-inch flat serving plate on a cake turner, if you have one, or the counter.
In a stand mixer with the whisk, start on low speed and whip the heavy cream. Slowly add the sugar and vanilla and continue mixing for 1 minute. Turn the mixer speed to medium and whip until medium peaks form, 4 to 8 minutes more.
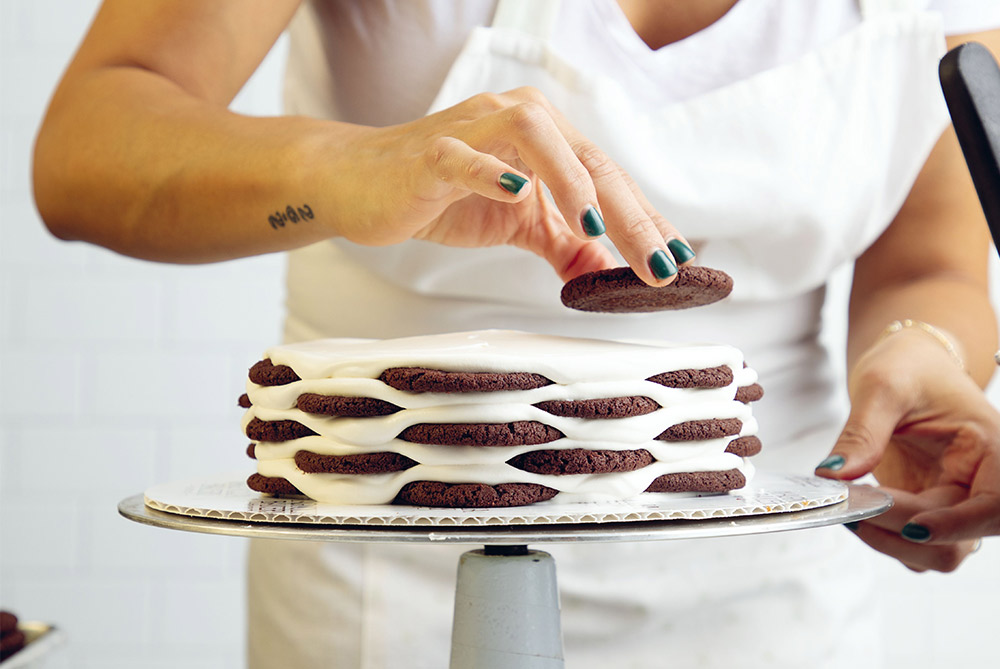
To assemble, use an offset spatula to spread about 2 tablespoons of the whipped cream onto the center of the plate in a round about 7 inches in diameter. Place 7 wafer cookies on top of the round of cream, placing one in the middle and 6 around the edge, making sure the wafers stick out slightly from the edge of the whipped cream.
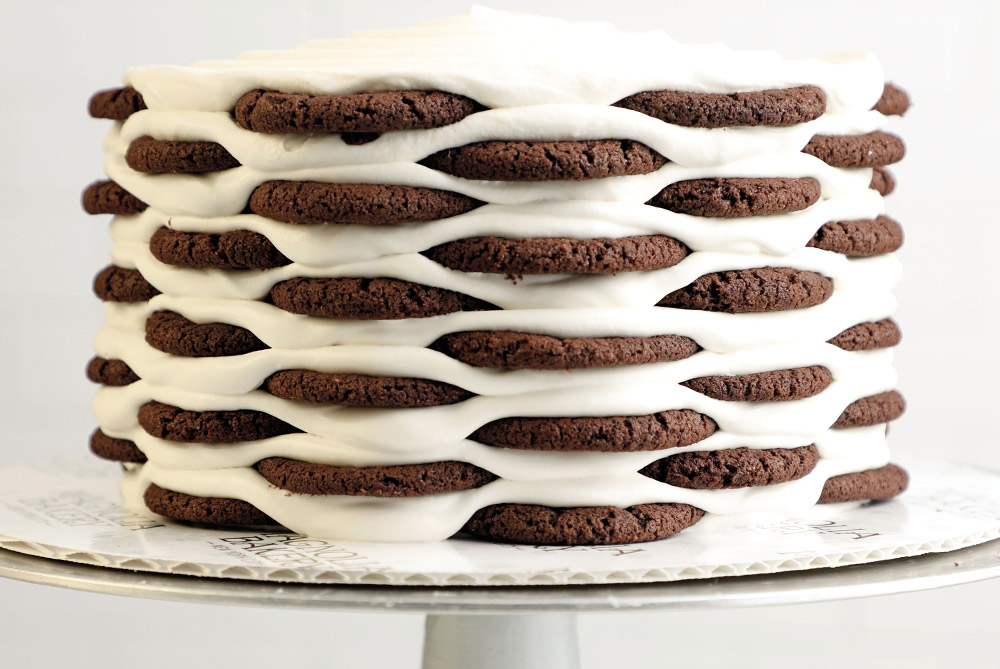
For the next layer, spread 3/4 cup of the whipped cream on top of the wafers, leaving just the edges of the wafers visible. Use 7 more wafers, this time placing the wafers directly in between the previously placed wafers. It’s like building a brick house.
Continue following these steps, alternating the wafers in the exact same pattern, until there are 10 layers of wafers and whipped cream. For the top layer of the icebox cake, use 1 3/4 cups of whipped cream and spread evenly over the top of the cake.
Place in a cake saver. If you don’t have a cake saver, cover loosely with plastic wrap. Refrigerate for at least 5 hours before serving.
• • • • •
CHOCOLATE WAFER COOKIES
makes about 140 cookies
Why buy packaged wafer cookies when you can make your own? These flavorful cookies are essential for our beloved Icebox Cake (see recipe above). Though they require a bit of work, you can make a lot at once and store them in the fridge or freezer for the next icebox cake. Each cake uses 70 cookies and this recipe makes double that amount.
- 4½-cups (607 g/21.6 oz) all-purpose flour
- 1 cup (120 g/4.2 oz) unsweetened dark cocoa powder (22% to 24%), sifted
- 4½-cups (900 g/31.9 oz) sugar
- 4½-teaspoons baking soda
- 1½-teaspoons baking powder
- 2 teaspoons salt
- 2¼-cups or 4½-sticks (508 g/18 oz) unsalted butter, cut into 1-inch pieces, at room temperature
- 3 eggs
Tip: When you reuse a baking sheet for the next batch, be sure to let it cool before you place the cookies on them, and line it with a new piece of parchment.
Preheat the oven to 325°F. Line two to four (depending on how many you have) baking sheets with parchment paper.
In a stand mixer with the paddle, combine the flour, cocoa, sugar, baking soda, baking powder, and salt. Mix on low for 30 seconds, until the mixture looks like sand.
On low speed, add the butter pieces a little at a time. Beat until the mixture resembles damp soil, 3 to 4 minutes. Turn the mixer off until you are ready to add the eggs.
Whisk the eggs lightly, then add to the cocoa-butter mixture on low. Beat until the mixture comes together into a dough, about 15 seconds or until there are no streaks of flour.
Use a small (#70) ½-ounce scoop to portion the dough and place on the prepared baking sheets, 3 across and 4 down, for a total of 12 per baking sheet. You will ultimately need to bake 12 sheets of cookies.
Cover the dough balls with a piece of parchment paper and use a flat-bottomed measuring cup to gently press down (not smash) the dough balls to flatten them. Remove the top parchment.
Bake two sheets at a time for 14 minutes, rotating top to bottom, front to back halfway through baking time, until the cookies look crisp but are not overbaked. Repeat until all the cookies are baked.
Cool completely. Store in an airtight container for up to 2 weeks. These can be wrapped tightly and kept on the counter for several weeks, or they can be wrapped in foil and zipped into a resealable plastic bag before storing them in the freezer for up to 3 months.
Recipes excerpted from The Magnolia Bakery Handbook (Harper Collins, $35) by Bobbie Lloyd.

Feature image: MAGNOLIA BAKERY in Los Angeles.
Nov. 12, 2020
Discover more FOOD news.


